Why it matters: Manually replying to contacts over iMessage doesn’t scale. With this action you can send personalized iMessages triggered by any CRM event-new leads, appointments, form submissions, replies, and more.
Key Benefits
Automated Messaging - Send iMessages automatically from any workflow Personalized Content - Use custom variables to tailor every message Attachment Support - Include an image, video, or file with your message Multi-Device Support - Choose which connected Apple device sends the message Workflow Integration - Combine with any CRM trigger for powerful automationWho Should Use It
Sales Teams - Instantly follow up with new leads over iMessage Support Teams - Send confirmations and updates automatically Agencies - Automate client-facing messaging across sub-accounts Operations - Send reminders, alerts, and status updates Marketers - Deliver timely, personalized iMessage touchesRequirements
Before using this action:Update your iMessage provider app to the latest version
- Go to App Marketplace → Installed Apps → iMessage provider → Update
How to Set Up
Step 1: Create or Edit a Workflow
Step 2: Add the Action
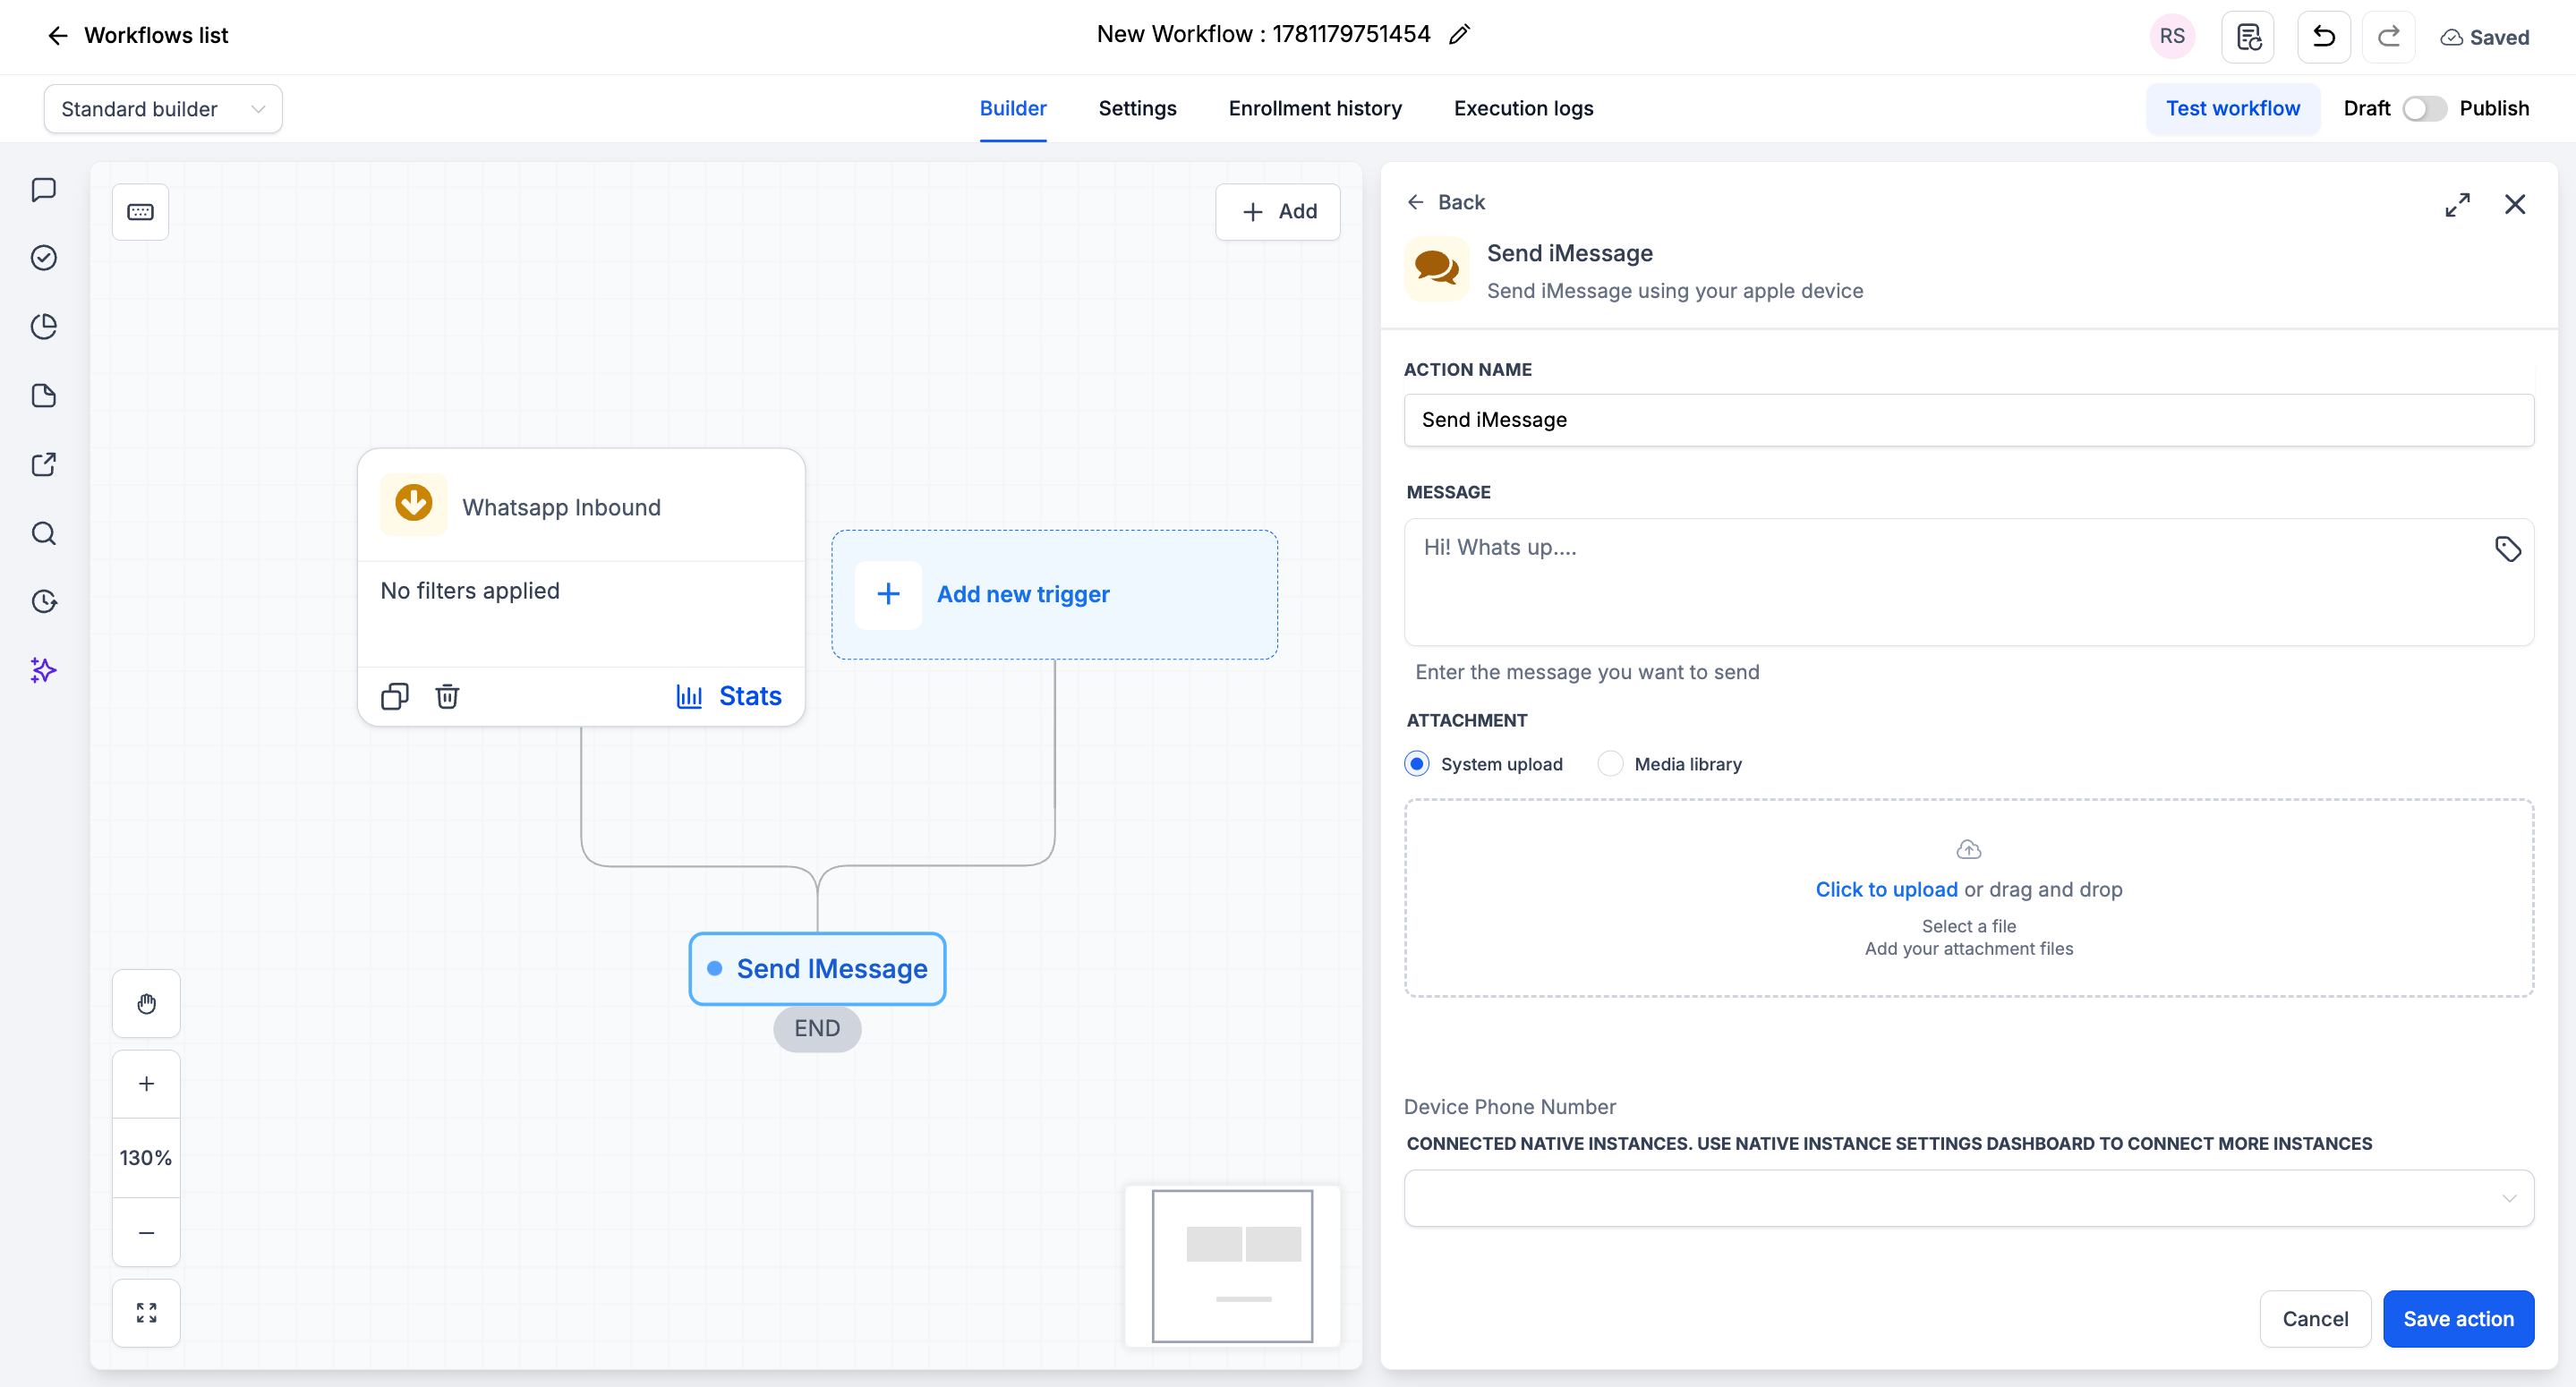
Step 3: Configure the Action
| Field | Required | Description |
|---|---|---|
| Action Name | Yes | A label for this action in the workflow (e.g. “Send iMessage”) |
| Message | Yes | The message text to send (supports custom variables) |
| Attachment | No | Upload a file (System upload) or pick one from the Media library |
| Device Phone Number | No | The connected Apple device to send from. Leave empty to use your dashboard’s default instance |
Step 4: Save and Publish
Action Fields Explained
Message Field
Enter the message you want to send. You can:- Type plain text
- Use custom variables (click the tag icon to insert)
- Include emojis
- Use line breaks for formatting
Attachment Field
Attach a file to send with your message. You have two options:- System upload - Click to upload, or drag and drop a file
- Media library - Select an existing file from your library
Device Phone Number Field
Choose which connected Apple device sends the message.Connected native instances. Use the Native Instance Settings dashboard to connect more instances.
Example Use Cases
Use Case 1: Instant Lead Follow-Up
Reply to a new lead the moment they submit a form. Trigger: Form Submitted Action: Send iMessage- Message:
Use Case 2: Auto-Reply to Inbound Messages
Acknowledge every inbound iMessage automatically. Trigger: iMessage Inbound Action: Send iMessage- Message:
Important Notes
Technical Details
- Messages send from your connected Apple device (native instance)
- Leaving Device Phone Number empty uses your dashboard’s default instance
- Supports text, emojis, and one attachment per message
- Works with all standard CRM workflow triggers
Best Practices
- Keep messages concise and personal
- Use relevant variables only
- Test before publishing
- Avoid over-messaging - too many messages cause fatigue
FAQs
Which device does the message send from?
Which device does the message send from?
The one you select in the Device Phone Number field. Connect more devices from the Native Instance Settings dashboard.
Can I attach a file?
Can I attach a file?
Yes. Use the Attachment field to upload a file (System upload) or pick one from the Media library.
Can I personalize the message?
Can I personalize the message?
Yes. Click the tag icon in the Message field to insert custom variables like
{{contact.first_name}}.What happens if my Apple device is offline?
What happens if my Apple device is offline?
The message will fail to send. Make sure your connected device stays online and signed in to iMessage.
Support
If you need help with the setup or onboarding:- Email: support@messagesync.ai